Tonight I am gearing up for a new unit: Wisdom! Within this unit we will be studying the American presidents for four weeks and then switching gears to study the electoral process for four more weeks. I am hoping to give you updates as I go along.
For now I wanted to share with you an awesome resource. I have this huge presidential timeline poster from C-SPAN Classroom on my kitchen wall. I got this poster free as well as the Electoral College Map poster this summer. I believe you still can but they need 3-5 weeks for delivery so hurry if you want one! Either way, check out the website it is full of teacher resources and videos.

Sunday, September 16, 2012
Tuesday, September 4, 2012
Family Read Aloud
I love family read aloud time. I have just begun Poor Richard by James Dougherty with my younger two children. My 16yo dd has read this one before and her high school curriculum keeps her pretty busy so she doesn't get to hang out with us during this school time read aloud but she often shows up to listen in the evenings for bedtime read aloud which is always a non-school-related book. Currently we are reading through the Caroline years of the Little House books.
Almost every night we sit around the living room for mom to read. This has become such a cherished activity that my younger two want to be read to more than I have time. To solve the problem, a couple years ago my eldest began reading to them too. Then when one child wanted her to read but not the other she pulled a separate book out for him or her to have read especially for only that one on one time. So on a particular shelf in my living room I have a pile of books. This is where we keep the books we are currently reading. And it seems to get bigger and bigger. They will each keep their current book that they are reading on their own on this shelf or sometimes on their headboards. And we have the book Mom is reading during school, the book mom is reading at bedtime, the book 16yo is reading to both her siblings as well as each book she is currently reading to the individual siblings and I even have one there that I am reading to dd when ds doesn't want to be read to. LOL
This time together has built such wonderful memories. We have bonded over stories we loved and even some we didn't like at all. My husband has come to read for us on occasion when his time allows and this is always a special treat. Some stories have made us look at maps and others have inspired us to try cooking something new. My children have colored while listening and other times built with blocks. There are no restrictions as long as they are quiet and listening but most of the time they prefer to just snuggle up beside me.
It doesn't matter how old my children get or how well they can read on their own, family read aloud time will still remain.
Monday, September 3, 2012
First Day of School Success
Today is Labor Day here in the U.S. but I don't take off these silly Monday holidays. Instead today we started school. With very little prep compared to previous summers I was a bit concerned but I decided not to sweat the small stuff. I did a little planning this weekend and figured I would fix things as they came along. And we had a remarkably smooth day. In fact we even finished early (not entirely because I forgot spelling).
We began our day with Bible time and KONOS activities. My kids had a new verse to memorize, Psalm 90:12 and we discussed what we would be studying for the next two weeks, stewardship of our time and what that means. We spent some time "numbering our days" figuring out how old each of their great grandparents were when they died, and averaged out the numbers to get a general idea of how long they might expect to live if the Lord blesses them with long life. Then they multiplied the average times 365 to see how many days that would be and subtracted the number of days they have already lived. I think it was an eye opener. Finally, I have them keeping track of how they spend their hours by keeping a log. Tomorrow they will graph this on a pie chart and start a new log. We'll do this every day for two weeks to complete an activity we are planning for co-op.
We finish our KONOS work and read aloud a half hour before lunch so my youngers can have some outdoor time while I help my eldest if she needs me. After lunch I work with them individually doing language arts and math. My son is taking typing this year and my third grader is going to learn cursive but I forgot it today so I'll be adding it into the schedule tonight.
I was surprised by how early we were finished; 1:30 for my third grade dd, 2:15 for my fifth grade son and right on time at 3 for my eleventh grade dd. So at 1:30 I decided to write out a Ben Franklin quote for the top border of our school wall. I made it really big and scrolled and dd8yo helped me color it in. The best part of our day was the way we finished. At 2:15 I told the youngers they were dismissed and they could go play but my son asked if he could play Timez Attack on the computer and my daughter asked if she could paint. Of course I answered with a resounding, "Yes!"
"Teach us to number our days that we may gain a heart of wisdom." Psalm 90:12
We began our day with Bible time and KONOS activities. My kids had a new verse to memorize, Psalm 90:12 and we discussed what we would be studying for the next two weeks, stewardship of our time and what that means. We spent some time "numbering our days" figuring out how old each of their great grandparents were when they died, and averaged out the numbers to get a general idea of how long they might expect to live if the Lord blesses them with long life. Then they multiplied the average times 365 to see how many days that would be and subtracted the number of days they have already lived. I think it was an eye opener. Finally, I have them keeping track of how they spend their hours by keeping a log. Tomorrow they will graph this on a pie chart and start a new log. We'll do this every day for two weeks to complete an activity we are planning for co-op.
We finish our KONOS work and read aloud a half hour before lunch so my youngers can have some outdoor time while I help my eldest if she needs me. After lunch I work with them individually doing language arts and math. My son is taking typing this year and my third grader is going to learn cursive but I forgot it today so I'll be adding it into the schedule tonight.
I was surprised by how early we were finished; 1:30 for my third grade dd, 2:15 for my fifth grade son and right on time at 3 for my eleventh grade dd. So at 1:30 I decided to write out a Ben Franklin quote for the top border of our school wall. I made it really big and scrolled and dd8yo helped me color it in. The best part of our day was the way we finished. At 2:15 I told the youngers they were dismissed and they could go play but my son asked if he could play Timez Attack on the computer and my daughter asked if she could paint. Of course I answered with a resounding, "Yes!"
"Never leave for tomorrow that which you can do today." ~ Benjamin Franklin
Monday, August 13, 2012
And I'm Off, Like a Herd of Turtles

Anyhooo... Today I'm gearing up to get back in gear. But before I could do anything school related it seemed fitting to get back to my blog and give an update (translate, avoid the school stuff yet again.) I don't know what's up with me. I usually love the school planning. I am looking forward to getting back to co-op and seeing all the kids and moms again but not the planning, book buying and the letter writing I have to do to homeschool in this state. Truth is I've waited far too long to write that letter to the superintendent so I really have to do that today. First thing. And I'm off...
Wednesday, May 9, 2012
Rock Classification

I'm a little out of order in my posting. Before we began the bird unit and before we classified plants but after we classified animals we classified rocks. I thought about just leaving this post out since I didn't get a chance to write it up when we were actually doing the unit and I hate to mix it in with might be a series of birds posts but I loved the pictures and I loved one of our activities and who really know if I'll get time to post about future bird activities anyway. So here I am.
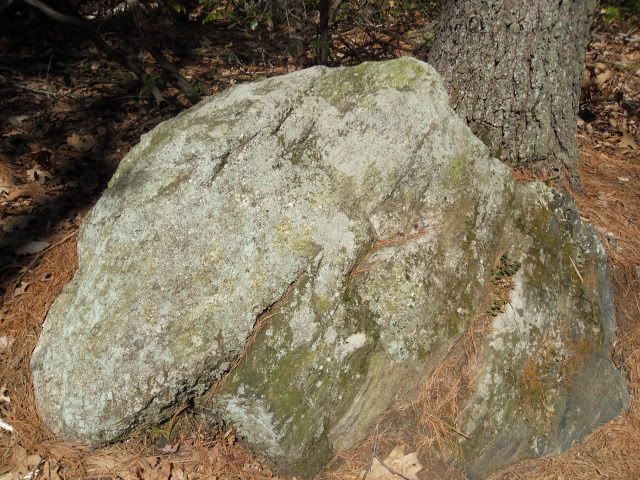
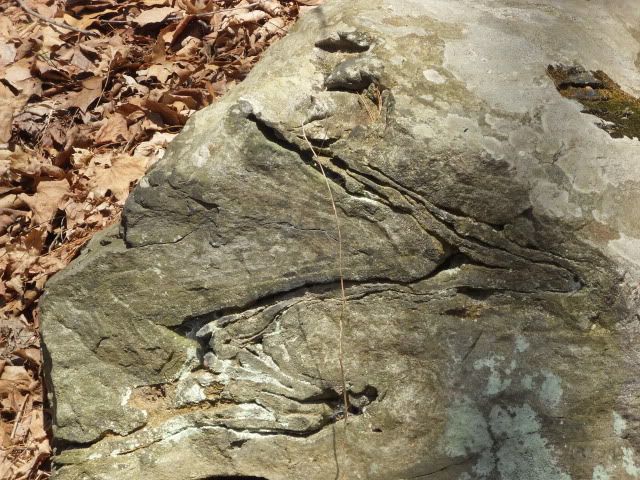
To start our short unit I took the kids walking through the woods to find rocks to bring home. We couldn't bring the really big ones home so we took pictures of those. On day two of rock collecting we came across a trail header with a sign that said to take out everything you brought in and nothing else except pictures. Hmmm. Not even rocks? That never occurred to me. I know you can't take plants out of the parks or pick certain flowers, but rocks?

I'm glad I brought my camera and notebook! Here's what you can do when you need to collect specimens to sort but you're not allowed. Take a picture of the interesting rock. In your journal, note the number of the picture on you camera. Even on my little point and click, I can tell which picture I'm on when I press the little button that shows me all the pictures I took. (Yeah, I'm clearly not a professional photographer. Don't even own a cool camera like all the cool bloggers have. But I'm okay with that. I know my limitations and I accept them.)
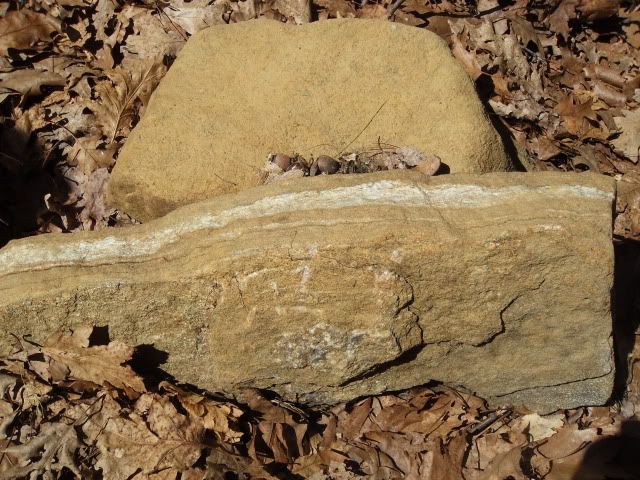
So once you've noted the picture number in your journal, add in all the details you can about the rock. Note cleavage, glossiness, sparkles, speckles, layering, even hardness can be tested to some extent in the field if you have a few tools with you. Stripes and color are important too even if you have a picture because sometimes, if you're a fancy photographer like me, you get home and look at the picture and what you thought was a white rock now looks kind of grayish.
I try to identify them right there if I can. I usually carry a pocket guide with me. My favorite pocket guides are the Golden Guides that have been around forever, most of them written by Herbert S. Zim as the Rock and Mineral one is. Pocket guides are not exhaustive though so sometimes you can't quite place a rock. (More often than not for me since I am SO very bad at sciency things!) But this is why it is so important to have good notes. If you can identify your rock while you are out and about, it's still great to have good notes for future collecting.
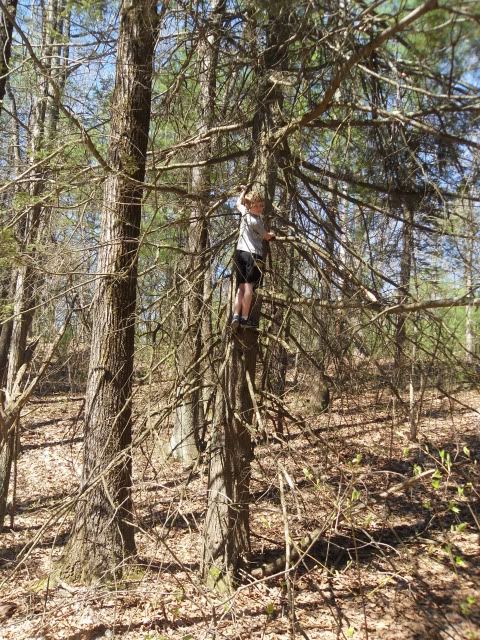
My son spent much of hiking time trying to find trees to climb.
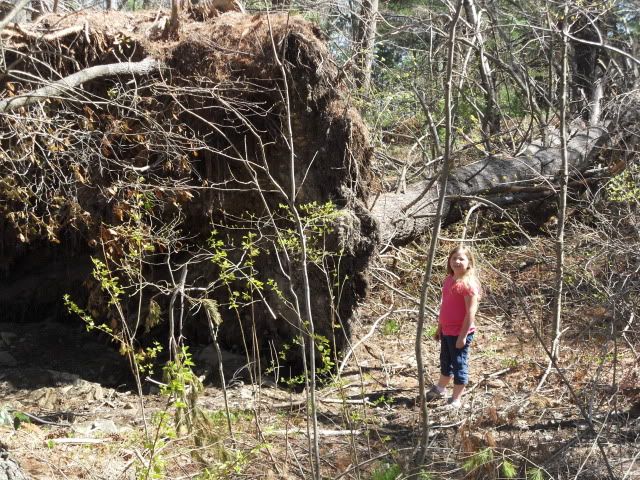
This is my daughter next to the roots of a tree that had fallen over last year. My son found this one particularly easy to climb since it was laying down for him.
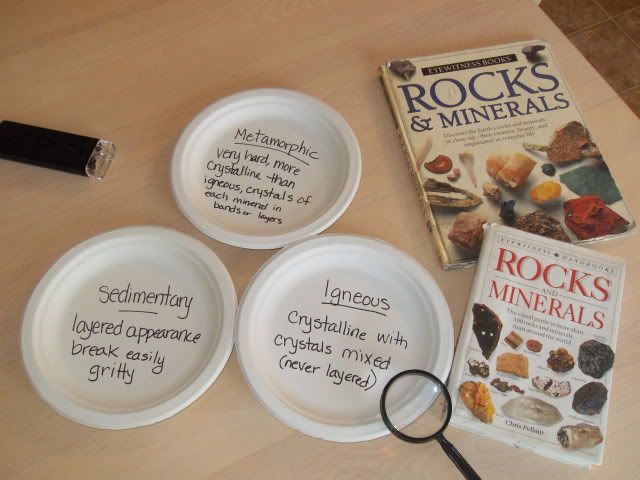
I'll share a simple activity we did on day one to start dividing up the rocks for identification. Breaking them into groups based on whether they were igneous, sedimentary or metamorphic I labeled paper plates for each category. A magnifying glass or even a hand held microscope and some identification books are all handy for this activity.

Then just start sorting the rocks. To make it easier to understand I chose the first few rocks and had my kids identify them. This way I could pick the obvious ones so they could really see the differences between the three types of rock.
That was my favorite activity. It was totally simple but worked well for beginning rock collectors. Including ME! :)
Tuesday, May 8, 2012
Bird Diagramming
 Yesterday we switched back to our final three weeks on Attentiveness with our focus on birds and John James Audubon.
 Choosing the Right Diagram
After finding a few different diagrams of birds on the internet I couldn't decide which I liked best. I liked the color in this one from the The Robinson Library, and it was nice and simple. But it looked maybe too simple. This one from the Birds of Yosemite National Park website seemed more detailed but I thought perhaps confusing for the kids. Finally, this one from Mr. Joanides' Wiki Pages (scroll 2/3 of the way down) looked pretty good but well, you know how it is. I just couldn't decide. The diagram with the wing spread out intrigued me and even the one at the top of Mr. Joanides' Wiki page showing the skeleton of the bird is pretty cool. There are tons of bird diagrams on the internet, all fabulous but somehow you have to narrow it down to what your needs are or
So I made the deciding process into an activity for my 9yo and 7yo. I asked them to look and compare the three different diagrams and tell me what they liked or disliked about each one and also explain how they are different. Finally I asked them to decide which they thought would be the best one to use for learning the parts of a bird and tell me why. They were very observant. (Awesome! Goal #1 met already and we haven't even learned anything about the birds yet!) While the one with color added to it was more attractive to my daughter, my son pointed out that the others had more parts diagrammed. The one with the parts labeled right on the bird they both thought was too confusing and "messy" but it labeled the coverts on the wings specifically whereas the colorful one did not and the third only pointed out the wing bars. Final decision? We're using all three.
Cut and Paste Diagramming
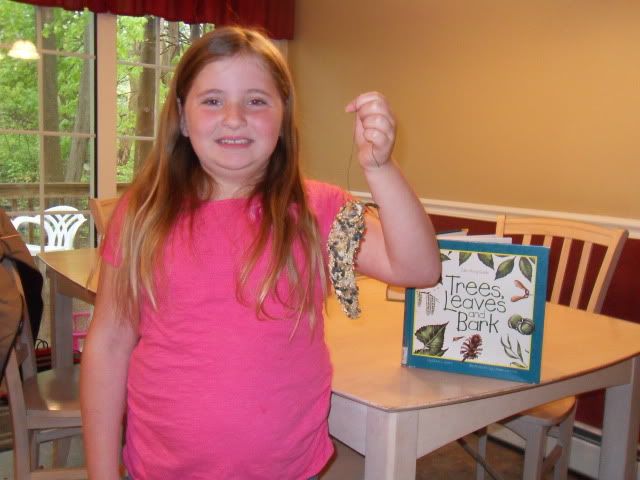
 Today I took the diagramming one step further than my usual "label-the-parts" method. I printed out a simple black and white outline drawing of a robin twice for each of my kids. On the first one I made labeling lines pointing to the different parts of the bird so they could label the parts as usual. The labeling didn't take very long and I let them use the diagrams they had chosen to find the right parts. In advance I colored and cut out the second bird's parts following the bird puzzle idea I got from The Adventures of Bear. When it came time to glue the puzzled out bird parts onto the black and white robin, I would call out a part and they would have to find it among their puzzle pieces and glue it onto the diagram they just finished labeling. It went well and doubled the retention possibilities of simply labeling.
Monday, May 7, 2012
Bayeux Tapestry
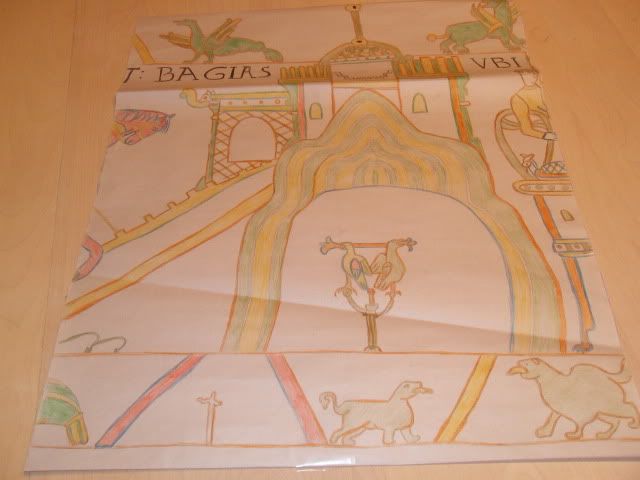
This will probably be my last post about the Middle Ages for a while. My eldest daughter has finished this section of HOW II and has moved on to China but I wanted to share a little about this particular project before moving on. And although some of my students groaned a bit when we began the project, they all worked to complete them and I think they are the better for it. The assignment in the HOW book was to make an embroidery copy of one section of the tapestry. Since none of the kids in my class wanted to learn to embroider and frankly we didn't have the time to devote to learning this handicraft, we opted for a simpler route of copywork. Each student was to choose one section of the tapestry and make a full-scale drawing using the grid method. Color was added as closely as possible with colored pencils. We couldn't get exact color matches but I allowed some leeway as long as they stayed within the color scheme.
Tuesday, May 1, 2012
Plant Crafts
Today was a rainy day so instead going outside to hunt for plants to identify we decided to get crafty with our plant specimens that were collected last Friday at co-op.

My son made a moss garden in a shallow dish. It came out beautiful and adorns our kitchen table as a centerpiece. The bottom has a layer of gravel sized rocks then he put in a layer of dirt over that. He broke off a piece of old log to lay in there and added a good sized rock so the moss will have something to climb on.
Finally he put about five different types of moss down over the dirt. I'm terrible at identifying rocks, and plants even though I am trying to teach my children how to do this. We have a tree/shrub in the front yard that when planted was supposed to be a rose of Sharon but I've seen rose of Sharon and this ain't one. It's been there about 8 years. But I digress. I think one of his moss samples is juniper moss. The rest I can't figure out. One is soft, short and compact, another has longish bits that are more separated and my kids call it coral moss but I don't think it is, and still another has very light tips growing out from darker stems and kind of looks like bitty worms, oh and I think there is still yet another kind of moss growing out in the midst of that one that looks like tiny palm trees with shiny leaves. Hmm, the more I look at this arrangement the more types of moss I find. I'm up to seven types now so I'm going to stop trying to describe them. Apparently there are about 12,000 species of moss so this blog post could go on forever.
We hope it will last a while if we keep it moist. But we've never done this before so who knows!
Tuesday, April 24, 2012
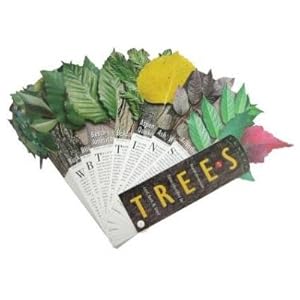
Plant Classification - Tree Identification
This week we have begun our focus on plants. This morning I went over leaf shape with the kids and we mainly looked at trees but I also allowed some shrub and flower leaves to be selected so they could see a variety of samples. We don't have palm trees here in Massachusetts and my lilies were the best place to find an example of parallel veins.
Between pinning websites that have nice identification tools and pulling books from my own shelves, I've compiled a list that I thought might be helpful to you in studying and identifying trees.


This leaf key is a small portion of what you will find at Virginia Tech's online Department of Forest Resources and Environmental Conservation website. Both of the above links are from Virginia Tech's Forestry Outreach Site, a wonderful place to visit if you are studying trees. The first picture of these two will take you to the page that directs your identification according to leaf, bark, twig or form.The picture just below it will take you to the page where you can begin identifying by leaf.
I filled the Amazon Carousel with an assortment of books and videos. Most are about trees but a few explore the purpose of seeds. I like to use different types of resources that are both informative as well as some that are purely for enjoyment. Combining pleasure reading that is still focused on your topic with your fact based books will help keep your kids more focused and allow them to enjoy variety.
Between pinning websites that have nice identification tools and pulling books from my own shelves, I've compiled a list that I thought might be helpful to you in studying and identifying trees.
Identification Websites
OPLIN - This is an Ohio based tree identification site that allows you to identify by leaf, fruit or name. I like the child-friendliness of this site and the pictures that help them narrow down the choices.
 |
| From Virginia Tech's Forestry Outreach Site |
This leaf key is a small portion of what you will find at Virginia Tech's online Department of Forest Resources and Environmental Conservation website. Both of the above links are from Virginia Tech's Forestry Outreach Site, a wonderful place to visit if you are studying trees. The first picture of these two will take you to the page that directs your identification according to leaf, bark, twig or form.The picture just below it will take you to the page where you can begin identifying by leaf.

I would be remiss if I did not include just one more identification site. Rogers Trees and Shrubs offers a very nice pictorial index for identifying both trees and shrubs which I found very helpful this morning. You can narrow down your search by clicking on a series of images which will finally take you to a page with specific information about your tree including type of tree or shrub, size, foliage, leaf type, types of fruit, flowering period, leaf color and growing conditions.

 Education.com has worksheets for kids of all ages including this cute tree labeling activity for preschoolers, a second grade apple tree growth chart and this word search for fourth graders.
Tree Leaf Card Game - Dayna from Fo-ne-tic-lee Speaking put together this really nice card set that you can print and use for free!
KONOS Volume I - Orderliness offers several good activities involving identification, charting plant groups, leaf sorting activities as well as arts and crafts projects.
The Mystery Challenge was created by the Arbor Day Foundation for schools. With some prep work, you can use this for homeschool and it provides a clear way to get your kids identifying trees by leaf. Although this is designed as an indoor activity, you might get the kids outside to collect bunches of different leaves on a nature walk in advance of the activity. Then use those leaves as your mystery leaves. You will need to be on the nature walk as well to make sure you get enough different samples as described in the activity directions.
Homeschool Share offers a free lapbook for tree study.
Now for some not-so-very-sciencey-but-certainly-educational-in-an-artsy-way activities:

We painted cherry blossom trees when spring first came to our cold neck of the woods albeit, a little bit early this year but no less welcome. I got the idea from the pin above.

There are tons of Christmas and fall tree crafts available online so I tried to steer away from them but this fall tree (and one other I am going to mention in a moment) can easily be made into a summer, spring or fruit tree and I love its simplicity.

This one seems a bit more complicated to me. I admit, I haven't tried it. The blogger shares her instructions with excellent photos. Go check it out and please let me know if you've tried it.

GORGEOUS! I just love this tree and I have enough paper bags to give it a try. This is the other tree labeled a "fall tree" but I can see how, with a little paint on the paper rolls before slicing, it could easily be a spring or summer tree.
Activities and Games with Some Hands-On
Education.com has worksheets for kids of all ages including this cute tree labeling activity for preschoolers, a second grade apple tree growth chart and this word search for fourth graders.Tree Leaf Card Game - Dayna from Fo-ne-tic-lee Speaking put together this really nice card set that you can print and use for free!
KONOS Volume I - Orderliness offers several good activities involving identification, charting plant groups, leaf sorting activities as well as arts and crafts projects.
The Mystery Challenge was created by the Arbor Day Foundation for schools. With some prep work, you can use this for homeschool and it provides a clear way to get your kids identifying trees by leaf. Although this is designed as an indoor activity, you might get the kids outside to collect bunches of different leaves on a nature walk in advance of the activity. Then use those leaves as your mystery leaves. You will need to be on the nature walk as well to make sure you get enough different samples as described in the activity directions.
Homeschool Share offers a free lapbook for tree study.
Now for some not-so-very-sciencey-but-certainly-educational-in-an-artsy-way activities:
We painted cherry blossom trees when spring first came to our cold neck of the woods albeit, a little bit early this year but no less welcome. I got the idea from the pin above.
There are tons of Christmas and fall tree crafts available online so I tried to steer away from them but this fall tree (and one other I am going to mention in a moment) can easily be made into a summer, spring or fruit tree and I love its simplicity.
This one seems a bit more complicated to me. I admit, I haven't tried it. The blogger shares her instructions with excellent photos. Go check it out and please let me know if you've tried it.
GORGEOUS! I just love this tree and I have enough paper bags to give it a try. This is the other tree labeled a "fall tree" but I can see how, with a little paint on the paper rolls before slicing, it could easily be a spring or summer tree.
Books and Videos
The line of Fandexes (Fandi? How do you pluralize Fandex?) from Workman Publishing is extensive. We have a couple different ones and they are always fun to pull out. The Tree Fandex is no exception.
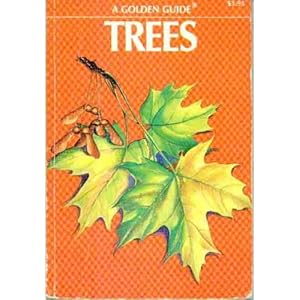
My favorite little books, The Golden Guides are easy to use, filled with lots of pictures and small enough to fit into your pocket on your next nature hike.
Sunday, April 22, 2012
Skit Guys - The Birdcage
Today's selection will mark the end of this short video series with a poignant message from one of my favorite comedy teams. God bless you this day.
Friday, April 20, 2012
Chonda Pierce - Psychiatric Hospital Bit
This woman is not afraid to talk about funny stuff. I just love her!
Thursday, April 19, 2012
Mother's Day with The Skit Guys
Mother's Day is coming so make sure you show your mom how much you appreciate her. I love you Mommy!
Wednesday, April 18, 2012
Have Your Taxes Done Rock n' Roll Style
I think I'm just doing a comedy series this week. I keep watching hilarious videos and they make me laugh and you know laughter is good for you. It says so in the Bible. I guess that means you have to watch the videos I'm posting this week.
Tuesday, April 17, 2012
Monday, April 16, 2012
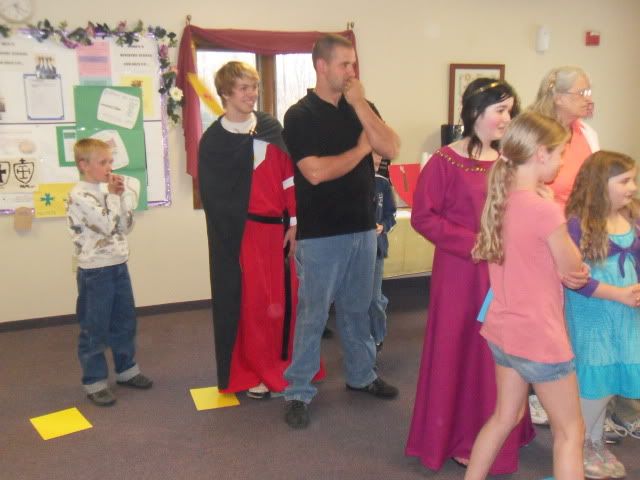
Our HOW II Medieval Feast

Our KONOS History of the World co-op celebrated the completion of the Middle Ages last week by holding a feast. After weeks of helping us with costumes, Johnnye came dressed in her own Medieval dress. With a class full of kids with little or no sewing experience, I was totally impressed watching them develop their handy skills under Johnnye's tutelage.
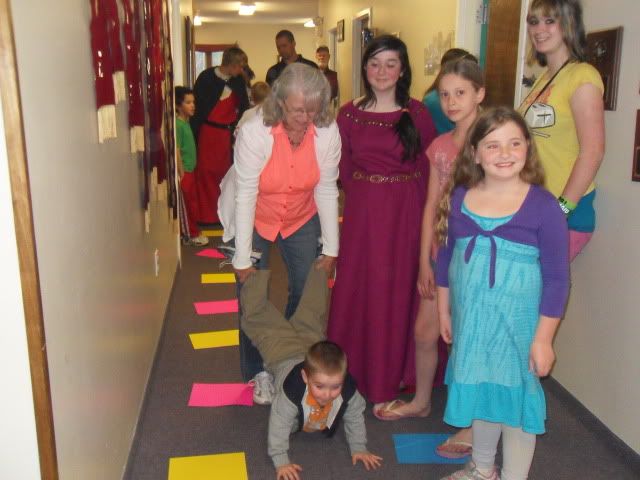
The "board game" the students created was based on the third crusade. They had three teams set out on crusade from the home countries of Germany, France and England. They had to follow their path over land and sea to reach Israel, answering trivia questions and completing activities along the way that coincided with events that happened during the third crusade.

When the French King Phillip got sick he was carried along the route. The action associated with this event was that two members of the team had to wheelbarrow race until the next turn. Sadly, we didn't get to do all of the activities that we came up with. Some of the game actions included the Germans having to carry the cross for the entirety of the game because they were the first to take up the cross in this crusade, German's having to bob for apples when their king Barbarossa drowned, and subsequently having to carry their king for several turns before the team dissolved and parted ways. Some to the English and French while others deserted altogether.
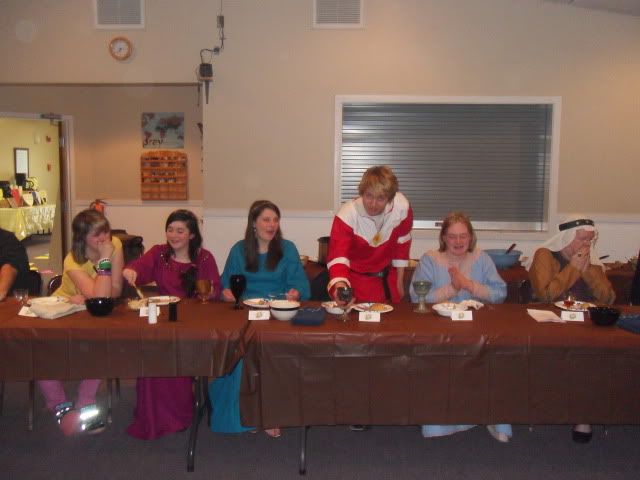
The feast itself was fabulous. We had tons of food served in three separate removes. Between the removes we gave time for tummies to digest a bit and allow for kitchen details to be taken care of by scheduling in entertainment. The class made a short Beowulf movie based on the final scene when Beowulf fights the dragon and dies. They made it into a comedy. And if I ever figure out how to load videos on the blog without them taking forever, I will post it for you.
The kids displayed their projects all around the foyer of the church where we held the event and we gave time for guests to view their work between the second and third removes. By then we were all stuffed and needed to move about the building before stuffing ourselves more.

One of our girls is involved in 4H and won awards for her excellent visual presentation she made on Heraldry.
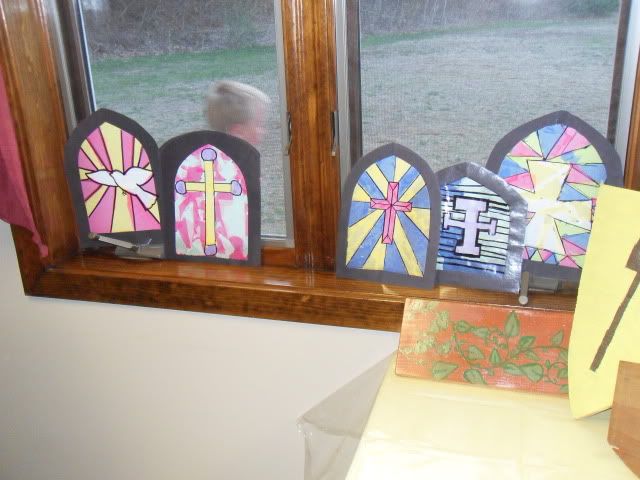
They made stained glass windows when we studied cathedrals and wooden shop signs while learning about village life.
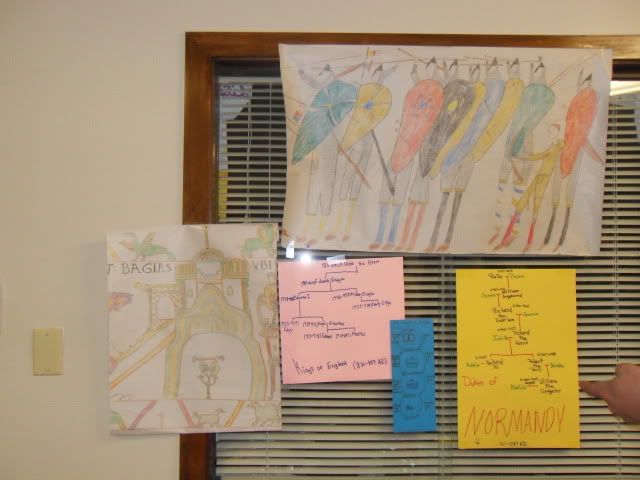
They included family trees that had been created at the beginning of the Medieval study as well as their copies of portions of the Bayeau tapestry. All of these projects were part of the HOW curriculum.
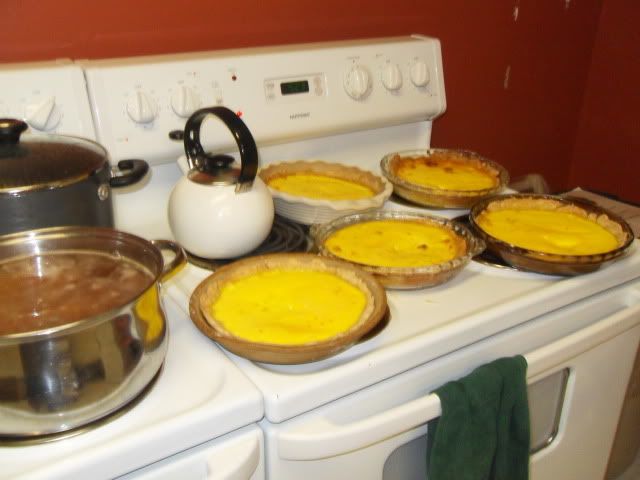
I wish I had gotten a picture of all the crockpots and roasters that were on the counters and lining the edge of the room. Here is a copy of our menu:
Beverages
Clove-Grape
Juice
Pomegranate
Drink
Mint
Water
Remove 1
Italian
Whole Grain Bread
Honey
Butter (optional)
Bashed
Neeps
Thick
Leek Soup
Roast
Chicken
Remove 2
Stew
of Apple
Venison
Stew
Meatloaf
Boar’s head
Toads
in a Hole
Remove 3
Apple
Fritters
Gingerbread
Cream
Custard Tart with Fig and Raisin Cream
Most of these recipes and menu ideas came from KONOS History of the World II Medieval Times Week 4 of 13 Medieval Daily Life. We were also blessed with recipes from a previous feast Johnnye had been a part of.
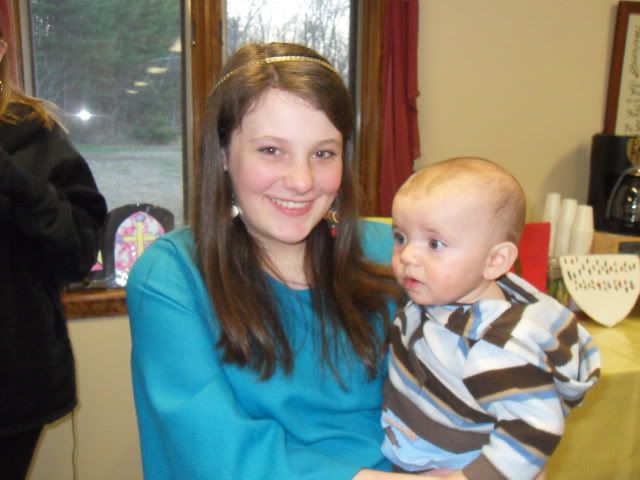
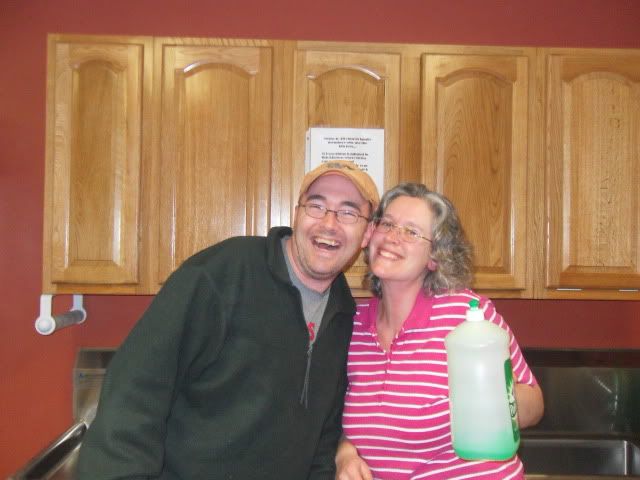
With all of the work done, I'm glad it is over and I can breath again but it was a great night of celebration with grandparents, friends and loved ones. My daughter (above) with a blessed baby friend and a beautiful couple overseeing the kitchen (below). Thank you Tony and Dianna!
Tuesday, April 3, 2012
Latest of the Kids
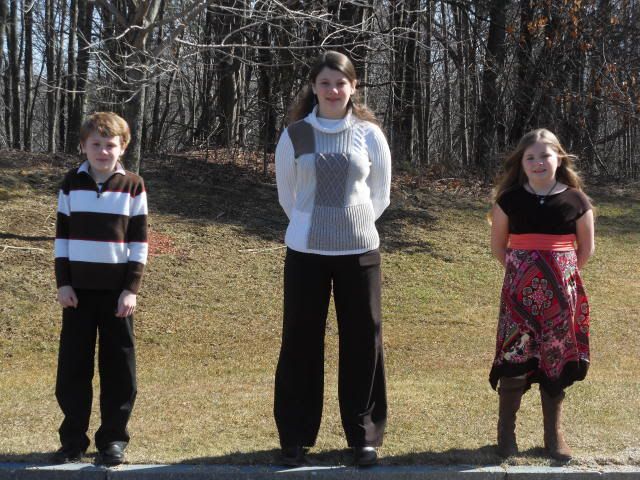
I love this shot, but I do not have a fabulous camera. Just a point and click type and even if I did have a great camera, I wouldn't know what to do with it. But this is our latest of the kids and I love it. My mom had it enlarged and put on a mounted canvas at Staples and it looks awesome on my living room wall.
Monday, April 2, 2012
Density Experiment
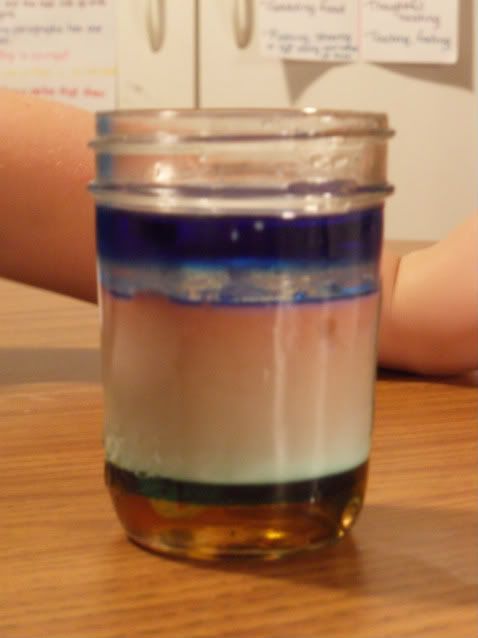 Density experiments are asked for on a fairly regular basis around here. I don't think my son realizes this is school stuff. Every now and then on a Sunday evening he will ask me if he can mix a bunch of stuff together in a bowl. I try to say yes as much as possible except when he wants to pour half a bottle of honey into a bowl of vinegar. That's when frugal mom radar goes flying up and I have to think quick. Last time he asked for one of these experiments I was thrilled that I already had a plan in place from a site I found while perusing Pinterest. E is for Explore is this fabulous website filled with cool yet simple-to-implement science and math experiments. And that is where I found a layering experiment video we could follow along and do at home that would not use up the next morning's milk supply.
 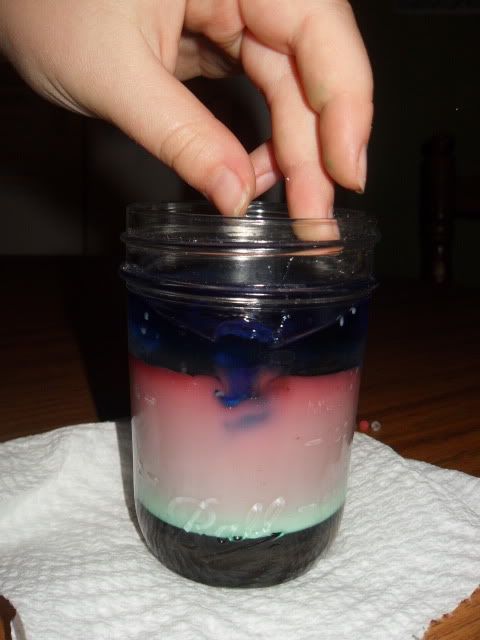 We altered the amounts of the individual ingredients to fit into a half pint-sized mason jar and skipped the liquids I didn't have on hand. (maple syrup and dish soap) My example shows what happens if you don't follow the instructions exactly. Don't you just love it when someone does that for you? You see the middle section of ours where it looks all white but has a fading color going up through it? That shows where we tried to pour the liquids down the side of the jar as instructed but forgot to use the turkey baster. It really does make a difference using the turkey baster. We also dropped solid objects in like the video suggests. You can see the die floating at the top of the bottom layer if you look very carefully at the top picture. Now that the kids have done this experiment with a plan of order and instructions, I think we'll try it again next time my son asks to pour a bunch of stuff into a bowl. Except, I'll let him choose the liquids and try to place them in order by density to see what he remembers.
Thursday, March 29, 2012
Eyes and Ears Wall
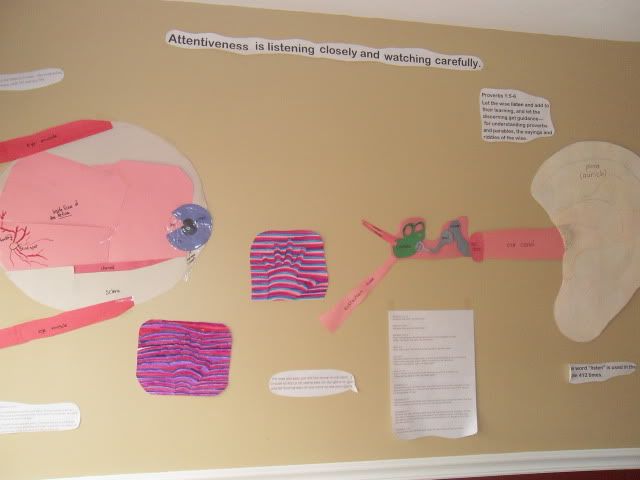
A few weeks ago we began studying the ear so after making the crawl through ear, I mounted the big auricle to my kitchen wall and had the kids help me diagram it using construction paper cut to the approximate shape of the inner ear parts. Then I added the title of the unit with a simple explanation, "Attentiveness is listening closely and watching carefully."
I usually like to include a few quotes with our units as well as interesting fun facts. Along with the verses in the KONOS book, I went online to Biblegateway and quickly looked up a few verses on listening and hearing, seeing and watching and printed the ones I wanted the kids to remember in really large font. And because there are so many awesome verses in the Bible and I have such a hard time choosing, I also printed out a list of others for observation and study but not for memorization. While I was searching on Biblegateway, I noticed that the word listen or some form of the word listen, was found 412 times. Fun factoid found for my wall!
The week we studied the eye the kids and I worked together to make the huge diagram of the eye. I was planning to add a bunch of optical illusions but we ran out of time and I only got one on there that I found on Pinterest. The 3-D hand.
Monday, March 26, 2012
Paper Bag Animal Masks
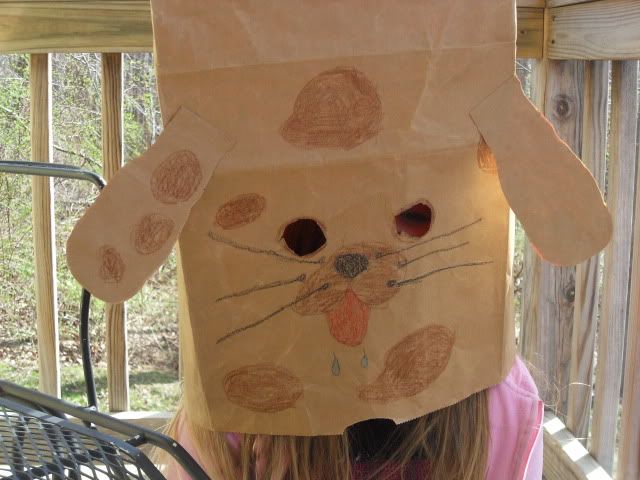
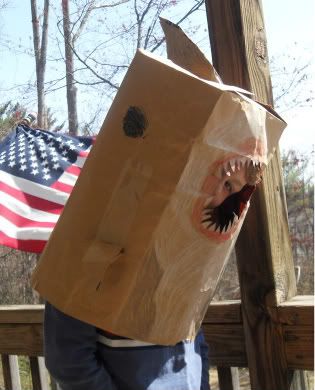 Good old fashioned fun. Today we started the Orderliness unit back up again with a focus on animal classification. I thought it would be fun to begin the week with a craft. While perusing the internet for some new fangled ideas I came upon Vintage Goodness where Mitzi had blogged about vintage cookbooks. She included a picture of some classic paper bag masks that reminded me of my childhood. And that's when I decided. Keep it simple. Have a good time. Give the kids ideas but let them design and create on their own. We're thrilled with the results.
Saturday, March 17, 2012
Spaghetti and Meatball Cake
Inspired by the folks over at Food Network, I had to give this spaghetti and meatball cake a try for a dear friend's 20th birthday.

This had to be a travelable treat so I made it on a cake tote tray. (Which doesn't make for a very pretty presentation.) Fortunately before I popped the lid on, my 7yo informed me that my lid was too short! Yikes, my cake would have been ruined before it even left the house!
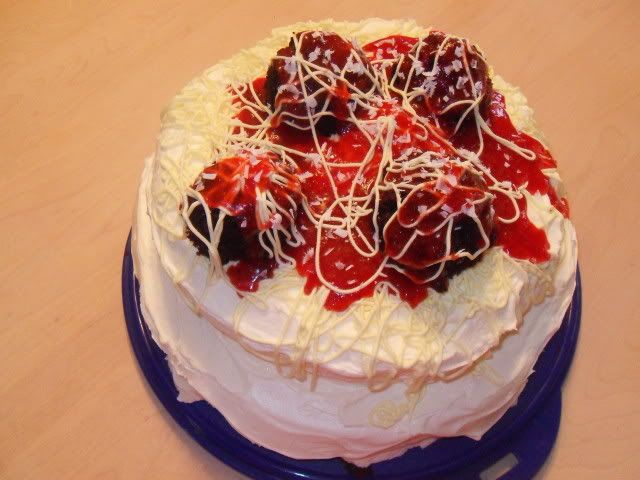
Mary is a chocolate lover so I made this using a sweet, delicious, moist chocolate cake and a to-die-for, light white chocolate frosting I found on Cooks.com. For assembly just follow the instructions at Food Network.
Mary was also the object of my daughter's efforts recently when she made her a friendship bracelet. The tutorial on that will be coming up soon!
Friday, March 9, 2012
Sound and Music
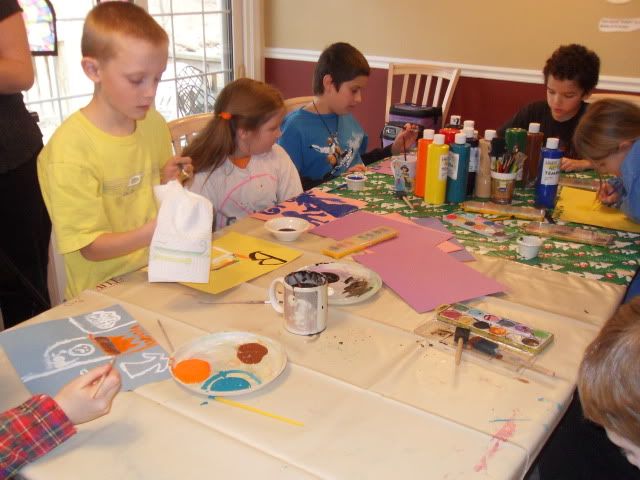
Two of our teachers are blessed by God to have the wonderful gift of musical talent. Last week Dianna and my husband talked to the kids about different types of sounds, notes and instruments. Dianna brought her saxophone and talked about how it is played and how to get a variety of sounds from it. My hubby taught the kids about the mechanics of stringed instruments. Then the kids poured water into bottles to experiment with notes. By blowing across the opening of the bottles they tried to match notes with a keyboard. This was pretty hard. I'm not sure they were very successful except that they discovered glass bottles would have worked better. They also made reeds using straws with slits cut into them. These were successful and very noisy!
This week, they focused more on musical terms, symbols on sheet music and dynamics. For a fun review activity a teacher held up the symbol on a card and the kids had to remember what the symbol meant and then they practiced making those sounds with their voices. After a little practice with this we got the paints out and had the kids paint pictures while listening to Beethoven's "Spring." They were instructed to listen quietly to the music and paint what they felt or what they thought the composer was feeling or thinking when he wrote the piece. We did NOT tell the kids what they were listening to until the activity was over. And when they were finished we talked about the piece and the kids shared about their paintings and discussed some of the dynamics of the song that they recognized.
We like to have a physical activity each week to help the kids get the wiggles out and move around a little bit. Praise the Lord the weather was so nice today. As a final test to see if they are learning to be more attentive the kids went outside and took part in a directive obstacle course. We didn't have a course set up, rather the students were given a verbal set of instructions to complete. This got all the kids cheering for each other and running around and having a great time.
Subscribe to:
Comments (Atom)