

Papel picado literally means perforated paper or punched paper. Some form of this paper cutting has taken place in Mexico since the Aztec empire. It has changed over the years as different influences and materials have come into the land. Originally it was called amatl by the Aztecs who made the paper cuttings of their gods out of a heavy paper made from the bark of mulberry and fig trees. Once Cortes conquered the Aztecs this practice began to change due to Christian beliefs and when China began trading in the region they brought with them fine paper that came into use for the cuttings. Now papel picado is still in use on holidays and as an art form with each color representing something specific.
 Traditional papel picado is made with many layers of thin paper such as tissue paper, stacked on top of a sheet of lead. A design is laid out and stenciled onto the paper and then cut out using special tools that are hammered down into the paper. Similar to punching a hole into something with an awl. Care must be taken to punch out just the right spots and the design itself can not be one that would cause the paper to become seperated from itself so that when all the design is cut out, the paper will still hold its full rectangular shape. Each sheet is about the size of regular copy paper, 8 1/2 by 11. Although we do not possess the array of tools needed for this art we could make our own variation using scissors.
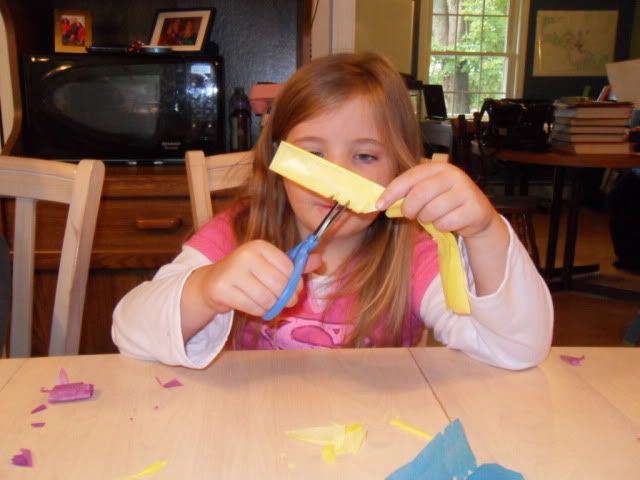
 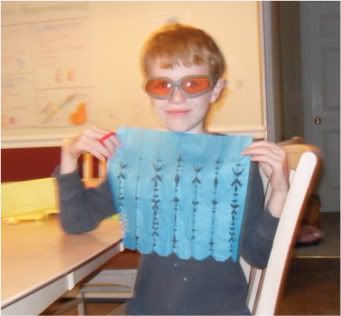 For our purposes we didn't worry about what each color represented we just chose bright colors that were available to us on short notice. We cut the tissue paper down to 8 1/2 by 11 pieces and then began folding the sheets in a fan fold fashion along the short side of the paper. Each piece was then individually snipped with scissors to create a design down each side of the folded paper, leaving about an inch or so at one end for folding over the string later. Once unfolded you have a unique design on your tissue paper and you are ready to move on to he next. We just kept doing a few sheets every day so the kids wouldn't get exhausted from it before we had enough for a banner. I wanted this to be a fun project and it remained that way. My son especially enjoyed this craft because he loves making snowflakes.
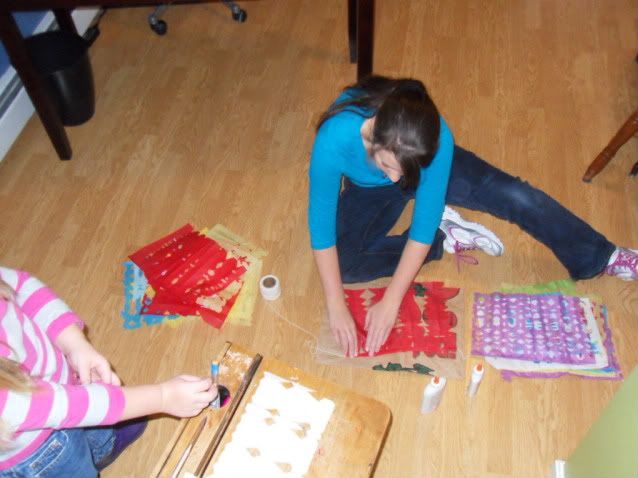 After all the sheets were made (or we ran out of time just before co-op was about to begin) my daughter glued them all onto a sring to be hung. We just used regular Elmer's glue. It held the sheets well and with the tissue paper being so light we didn't have to wait for it to dry before hanging it. We managed to get the final end of the sring taped to the ceiling about five minutes before the first family arrived for co-op!
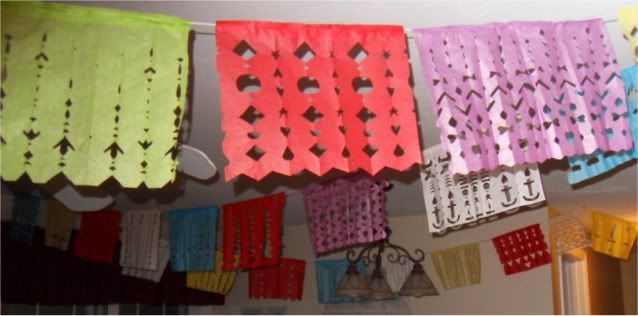
3 comments:
When I saw your post above this one, I was going to ask where you 'bought' your paper banners. They look exactly like the one's that were strung all throughout our Mexican supermercado. (I blogged about that trip here: http://cultivatedlives.blogspot.com/2010/07/simple-trips.html)
That is such a great idea. When we revisit Mexico again, we'll have to give this a try! :)
Wow, those are stunning. Any chance of a tutorial??
Blessings
Shirley
Thank you Ladies for your lovely compliments.
Shirley,
I don't think I'll be getting to do a tutorial on this one but I bet if you give it a whirl, you will find it very simple. Just think of a paper fan crossed with paper snowflakes.
Blessings,
Cheryl
Post a Comment